How to Create a Bootable Windows USB Drive for UEFI BIOS and Legacy BIOS
Motherboards and laptops based on UEFI BIOS, which have dominated the computer market over the past seven years since their inception, introduced an additional requirement for bootable USB drives—compatibility with UEFI mode. How do you create a bootable USB drive to install Windows that is also compatible with UEFI software for Windows 7, Windows 8.1, and Windows 10?
Not all programs for creating bootable USB drives support UEFI adaptation, but a few do. Below, we’ll review three such tools and explain the step-by-step process for using them to write a Windows installation image to a USB drive. All of these programs are available for free.
Media Creation Tool
Creating a bootable USB drive to install the latest version of Windows 10 is easiest with the portable utility Media Creation Tool. Developed by Microsoft, this tool is available for download from the company’s official website.
he utility is primarily designed to download the latest Windows 10 distribution, but it also offers the option to create a bootable USB drive compatible with UEFI BIOS. After accepting the license terms in the utility’s window, you need to select the option to create an installation media.
Next, you’ll need to choose the language, edition of Windows, and processor architecture.
Finally, select the option to create a USB drive and specify its drive letter.
The writing process won’t be quick, as the utility will first format the USB drive and then download the latest operating system distribution from Microsoft servers.
If the Windows distribution is already stored on your computer and only needs to be written to a USB drive, the following two programs can help.
Rufus
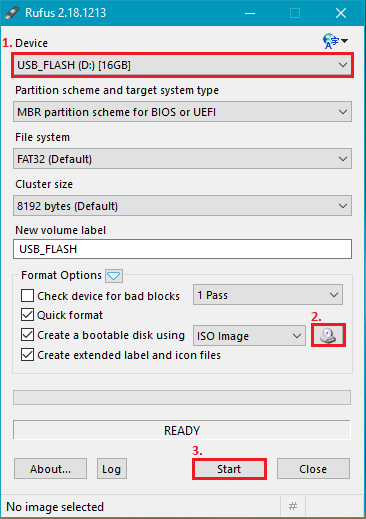
The advantage of the Rufus utility lies in its minimal user actions. Formatting the USB drive and other important steps are set by default. The main choice the user needs to make concerns the type of BIOS. If the USB drive is being created for UEFI BIOS, select “GPT for UEFI computers” in the partition scheme field. Then, use the browse button to specify the path to the ISO file containing the system distribution, and click “Start.”
Rufus also allows you to create universal bootable drives compatible with any BIOS mode. To do this, select the partition scheme “MBR for computers with BIOS or UEFI.” However, if the Windows distribution prepared for installation on a computer with a traditional BIOS includes files larger than 4 GB, you need to set the file system type to NTFS.
Bootable UEFI GPT Flash Drive with Windows 7
Many wonder if it’s possible to create a UEFI-compatible flash drive with Windows 7. The answer is yes, but only for the 64-bit version. The USB flash drive must be formatted in the FAT32 file system and have a capacity of at least 4 GB. Additionally, the disk where the system will be installed must use the GPT partition scheme.
Here’s how to configure Rufus for this task:
- Device: Select your USB flash drive.
- Boot selection: Choose the ISO image of Windows 7.
- Partition scheme: Select GPT.
- Target system: Choose UEFI (non-CSM).
- File system: Set it to FAT32.