No Sound on Laptop or Desktop? What to Do?
Users of laptops or desktop computers rarely encounter sound issues, but when sound disappears, the reasons can vary. Let’s try to identify the main causes of this problem and fix them to restore sound on your laptop or PC.
The first and most obvious thing to check is whether the sound is muted in your system. After booting up your operating system, look at the notification area where the clock and system icons are located. If you see a red crossed-out circle next to the sound icon (Speakers), it means the sound is muted. Simply increase the volume using the slider or the function keys to restore the sound.

Also, check the sound source itself—whether it’s a video or audio player. Make sure the sound is enabled there. Sometimes, users accidentally press a hotkey that mutes the sound, and then spend a long time trying to figure out why it’s not working.

For a desktop computer, check the cable connected to the external speakers. It should be plugged into the green port on the motherboard. Also, make sure the speakers’ amplifier is receiving power.
The port on the laptop isn’t working
If everything seems fine in the system, the volume slider is set to 100%, but there’s still no sound, check whether the sound works when connecting external headphones or speakers. Plug the appropriate jack into the port with the headphone symbol (usually green) and play some audio in a media player. If sound comes through the headphones or speakers but not through the laptop’s built-in speakers when the jack is unplugged, the issue is likely with the port itself or, less commonly, with the laptop’s internal speakers.
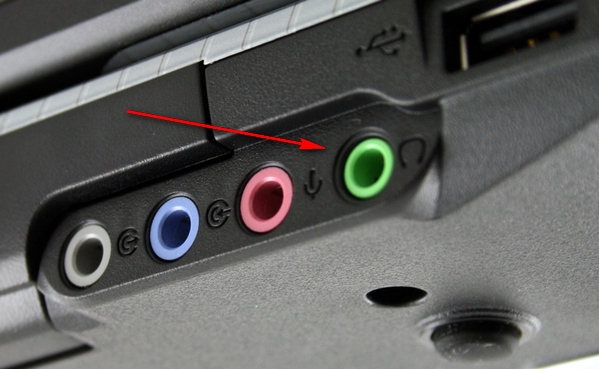
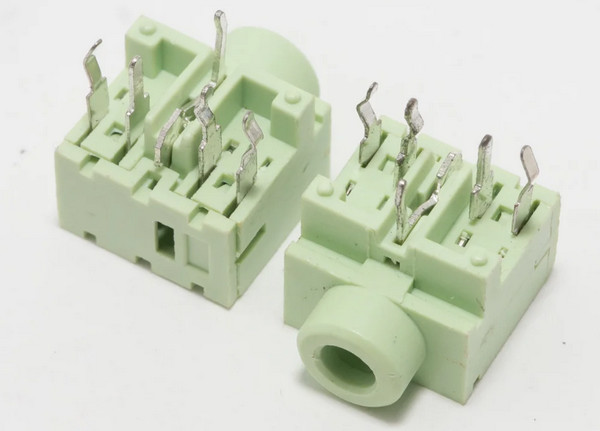
The headphone jack has a mechanical switch that automatically disables sound output to the speakers and redirects it to the headphones. If this switch gets stuck, it won’t return to its default position (to the speakers), and the laptop won’t output sound through the built-in speakers. Additionally, a small object, crumb, or dust might have gotten into the jack, preventing it from working properly. In this case, the jack should be cleaned, but it’s best to consult a professional to resolve the issue or replace the faulty jack.
Problem with audio drivers
If there is no sound even when an external audio device is connected, you should investigate issues with the sound card. Start by checking the presence of sound card drivers. Click ‘Start’, right-click on the ‘Computer’ icon, and go to ‘Properties’.
Next, the Control Panel will open, where you should navigate to Device Manager. In the list, locate Sound, video, and game controllers. Expand this group to find something like Realtek High Definition Audio, which is your laptop’s sound card. If you see a yellow exclamation mark next to any device in the Device Manager, it indicates that the device is not functioning correctly. In this case, you need to update its driver.
To update the audio device driver, double-click on the audio device and go to the Driver tab. Click on the Update Driver button to search for and install the most suitable driver.
Next, choose either ‘Search automatically for updated driver software’ or ‘Browse my computer for driver software’ if the system cannot find the driver automatically. For manual installation, simply specify the path to the folder containing the extracted driver files.
You can find and download the driver from our website, driverslab.ru, or go to the laptop manufacturer’s official website.
On the manufacturer’s website, locate the Support or Downloads section. Enter your laptop model and operating system to view the list of available drivers and utilities. Find the audio driver and download it to your computer. The driver may be included in a sound management utility (Sound Manager). After downloading the driver, install it like any other program. Once the installation is complete, restart your laptop.
Configuring sound in the Control Panel
If the driver has been updated but the sound still hasn’t returned, open ‘Playback devices’ by right-clicking the sound icon (Speakers) in the lower-right corner (or by accessing it through the Control Panel).
The last thing you can check is the BIOS settings on your laptop. During the initial startup phase, press the BIOS access key (usually DEL, F2, F10, Esc, or another key depending on your laptop model or motherboard manufacturer).
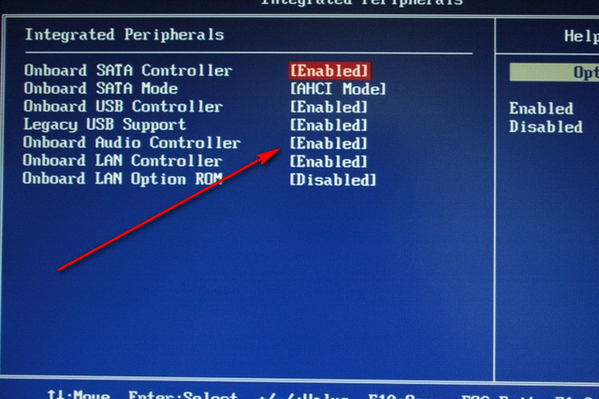
Once in the BIOS, navigate to the section for integrated devices (Integrated Peripherals or Onboard Devices Configuration). Look for any mention of audio, such as Onboard Audio Controller, which should be set to Enable.
If you find that the audio device is disabled (Disabled), enable it. After making the changes, press F10 and then Enter to save the settings in the BIOS.
If none of the suggestions helped you restore sound on your computer, it’s best to contact a service center. There’s a high likelihood that the audio chip has failed or there is another hardware issue.